

Modern enterprises face significant challenges in connecting business intelligence platforms to cloud data warehouses while maintaining automation. Password-based authentication introduces security vulnerabilities, operational friction, and compliance gaps – especially significant because Snowflake is disallowing username passwords.
Amazon QuickTime Sites (a capability of the Amazon QuickTime suite) now supports key pair authentication for Snowflake integration using asymmetric cryptography, where RSA key pairs replace traditional passwords. This enhancement addresses a critical need as Snowflake moves toward rejecting password-based authentication, requiring more secure authentication methods. With this new capability, Amazon QuickTime Suite users can establish secure, passwordless connections to Snowflake data sources using RSA key pairs, providing a seamless and secure integration experience that meets enterprise security standards.
In this blog post, we will guide you in setting up data source connectivity between Amazon Quick Sites and Snowflake through secure key pair authentication.
Prerequisites
Before you configure key pair authentication between Amazon QuickTime and Snowflake, make sure you have the following:
- An active Amazon QuickTime account with appropriate permissions – You need administrative access to create and manage data sources, configure authentication settings, and grant permissions to users. An Amazon QuickTime Enterprise license or the Author role in Amazon QuickTime Enterprise Site Edition usually provides sufficient access.
- A snowflake account With the ACCOUNTADMIN, SECURITYADMIN, or USERADMIN role – These elevated permissions are required to modify user accounts, assign public keys using the ALTER USER command, and grant warehouse and database permissions. If you don’t have access to these roles, contact your Snowflake administrator for assistance.
- OpenSSL Install (for key generation) – This cryptographic toolkit generates RSA key pairs in PKCS#8 format. Most Linux and macOS systems come pre-installed with OpenSSL. Windows users can use Windows Subsystem Linux (WSL) or download OpenSSL separately.
- (optional) AWS Secrets Manager access (for API-based setup) – Required for programmatic configuration, you’ll need IAM permissions to create and manage secrets, and Amazon Quick Sites API access for automated deployments and infrastructure as code (IaC) implementations.
solution walkthrough
We will guide you through the following essential steps to set up secure key pair authentication between Amazon Quick Sites and Snowflake:
- Generate RSA key pair – Generate public and private keys using OpenSSL with appropriate encryption standards
- Configure Snowflake User – Assign the public key to your Snowflake user account and verify setup
- Establish data source connectivity – Create your connection through the Amazon QuickTime UI for interactive setup or the AWS Command Line Interface (AWS CLI) for programmatic deployment.
Let’s learn each step in detail and secure your Amazon QuickSight-Snowflake connection with key pair authentication!
Generate RSA key pair:
- Navigate to AWS CloudShell in the AWS Management Console and execute the following command to generate the RSA private key. You will be prompted to enter an encryption passphrase. Choose a strong passphrase and store it securely—you’ll need it later when generating the public key.
- Run the following command to generate the public key pair. You will be asked to enter the phrase you used in the previous step.

- Remove private key content (including header and footer):
This displays your private key in this format:
-----BEGIN PRIVATE KEY-----(key content)-----END PRIVATE KEY-----
CommentCopy the entire output including : -----BEGIN PRIVATE KEY----- And -----END PRIVATE KEY----- lines. You will use this entire private key (with header and footer) when creating your Snowflake data source connection.
- Snowflake requires the public key to be in a specific format without headers or line breaks. Run these commands to properly extract and format the key.

This will display your formatted public key string. Copy this output—you’ll use it in the next step to configure your Snowflake user account.
Assign public key to snowflake user:
- Log in to Snowflake and execute the following SQL command to allocate the public key to your user:
- Verify Main Assignment: Find
RSA_PUBLIC_KEYProperty to confirm whether the public key is set or not.
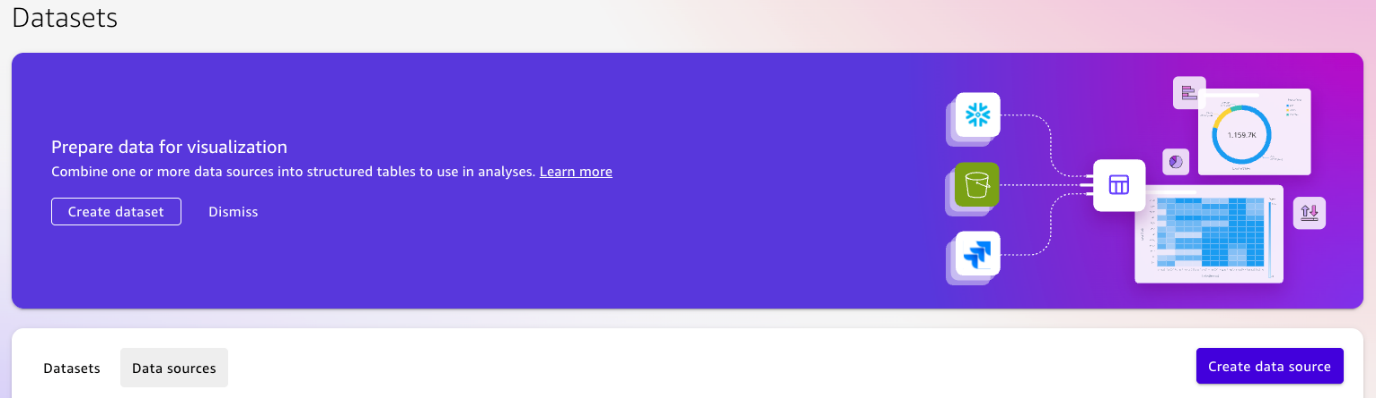
Establish your Snowflake connection in the Amazon Quick UI:
- Go to Amazon Quick in the AWS Management Console and select dataset. then select data source Tab and select create data source.
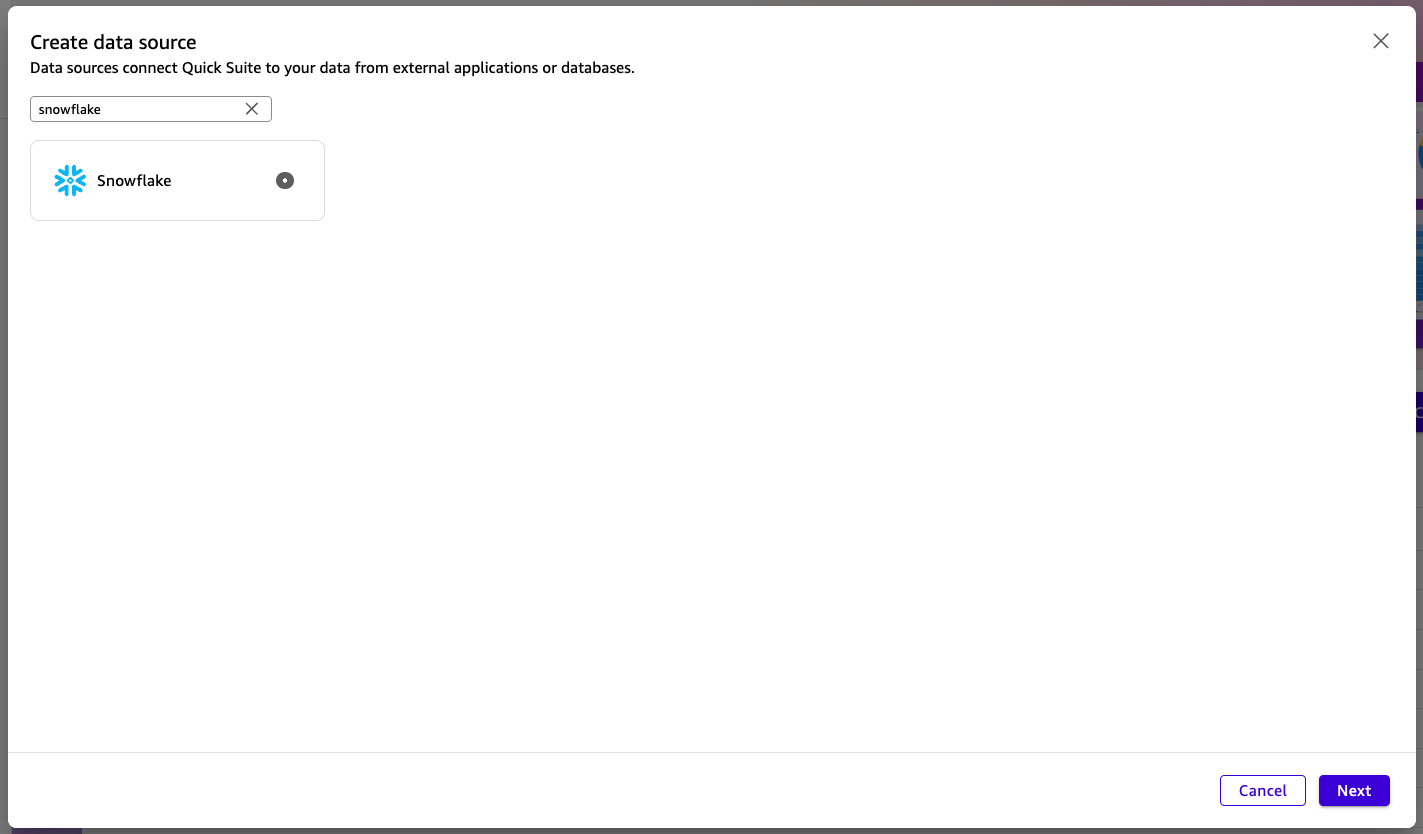
- In create data source pane, enter “snowflake” search datasetchoose snowflake, and then select next.
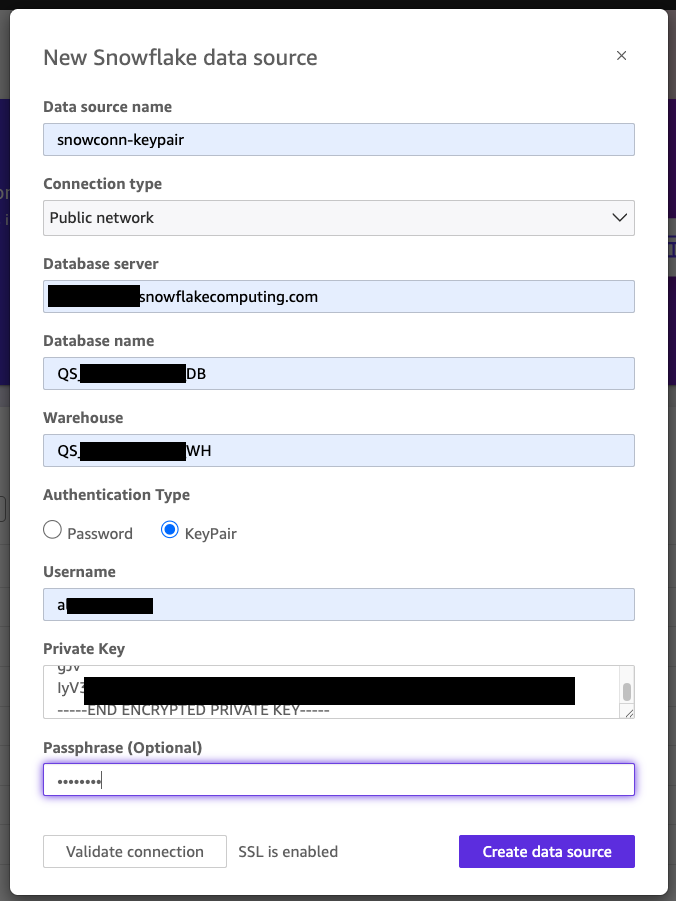
- In the New Snowflake Data Source pane, enter the data source name, then enter the connection type Public Network or Private VPC Connection. If you need a VPC connection, see Configure a VPC connection in QuickTime.
- Then, enter the database server hostname, database name, and warehouse name.
- choose Authentication Type As key pair And then enter the username of the snowflake user.
- In private key Paste entire output from field
cat rsa_key.p8(including start and end headers). If you configured a passphrase during key creation, provide it in the Optional Passphrase field. - After entering all the fields, select validate connection button.
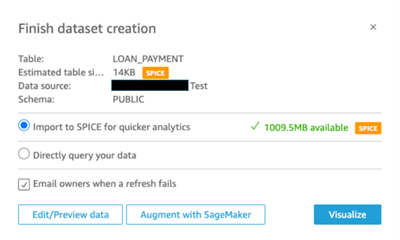
- Once the connection is verified, select create data source button.
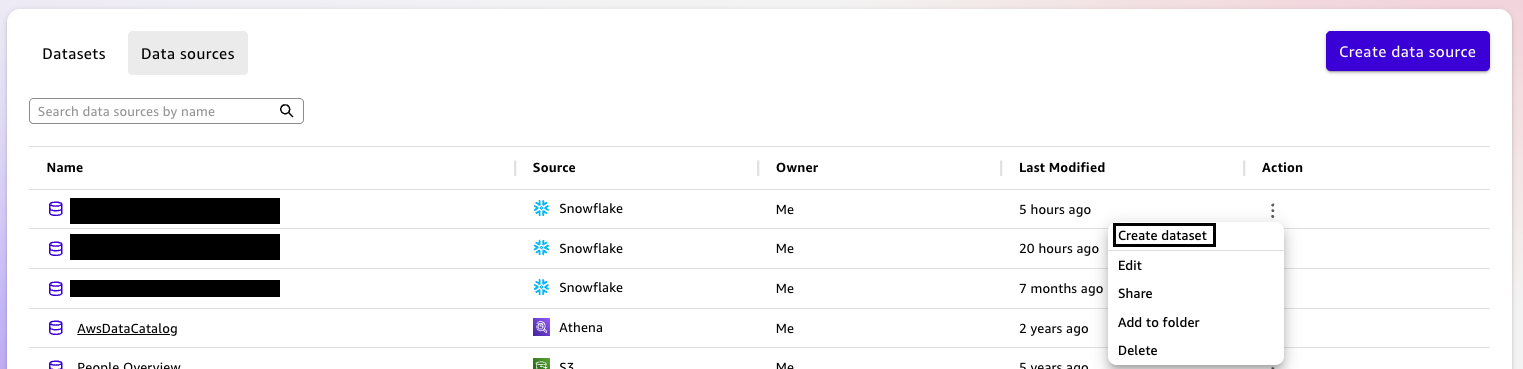
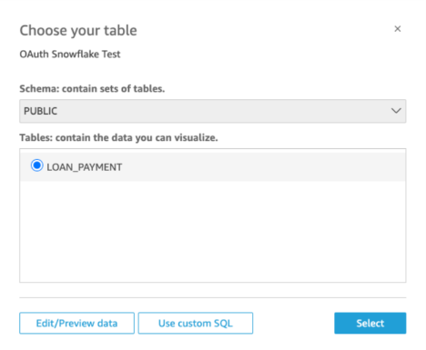
- Then in the data sources list, find the Snowflake data source you created.
- From action Menu, select create dataset Option.

Establish your Snowflake connection using the Amazon Quick Sites API:
Using the AWS CLI, create an Amazon QuickTime data source connection to Snowflake by executing the following command:
Use the following command to check the build status:
Initially, the status returned from the describe-data-source command will be CREATION_IN_PROGRESS. the situation will change CREATION_SUCCESSFUL If the new data source is ready to use.
Alternatively, when creating the data source programmatically CreateDataSourceYou can store usernames, keys, and passphrases in AWS Secrets Manager and reference them using the Secret ARN.
Once the data source is successfully created, you can navigate to the Quick Console. In create a dataset On the page, you can see the newly created data source connection awsclikeypairtest Under the Data Sources list. You can then continue creating the dataset.
cleanliness
To clear your resources to avoid additional charges, follow these steps:
- Delete the created secret in the AWS Secrets Manager console.
- Delete the data source connection created in Amazon Quick.
conclusion
Key pair authentication represents a transformational advancement in securing data connectivity between Amazon QuickTime and Snowflake. By addressing password-based vulnerabilities and adopting cryptographic authentication, organizations can achieve a better security posture while maintaining seamless automated workflows. This implementation addresses critical enterprise needs, such as increased security through asymmetric encryption, streamlined service account management, and compliance with evolving authentication standards as Snowflake transitions from traditional password methods.
Whether deploying through the intuitive Amazon QuickTime UI or using the AWS CLI for infrastructure as code implementation, key pair authentication provides flexibility without compromising security. Integration with AWS Secrets Manager helps protect private keys, while the straightforward setup process enables rapid deployment into development, staging, and production environments.
As data security continues to evolve, adopting key pair authentication keeps your organization at the forefront of best practices. Business Intelligence teams can now focus on extracting actionable insights from Snowflake data instead of managing authentication complexities, ultimately accelerating time-to-insights and improving operational efficiency.
For further reading see Snowflake key-pair authentication.
About the authors