

Image by editor
, Introduction to Gradio
Gradio is a Python framework that changes the way machine learning practitioners create interactive web interfaces for their models. With just a few lines of code, you can create sophisticated applications that accept various inputs (text, images, audio) and display output in an intuitive way. Whether you’re a researcher, data scientist, or developer, Gradio makes model deployment accessible to everyone.
Some of the benefits of Gradio include:
- It allows you to go from model to demo in minutes
- You don’t need frontend skills, just pure Python implementation
- It has support for text, images, audio and more
- You can easily share and deploy locally, and even host publicly for free
, Installing Gradio and Basic Setup
To get started with Gradio, you need to install the package using the pip command.
Now that you’ve installed Gradio, let’s create our first Gradio application. First, create a file and name it gradio_app.py Then add this code:
import gradio as gr
def greet(name):
    return f"Hello {name}!"

demo = gr.Interface(
    fn=greet,
    inputs="text",
    outputs="text",
    title="Greeting App"
)

demo.launch()
run with python gradio_app.pyand you will have a running web application http://127.0.0.1:7860/The interface provides a text input, a submit button, and a text output – all generated automatically from your simple specification,
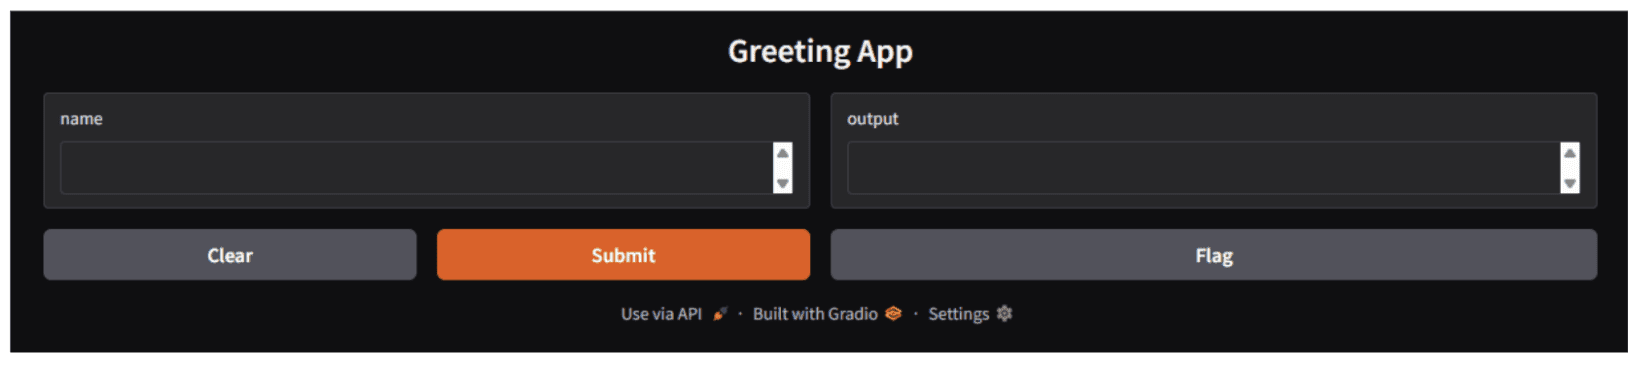
Image by author
, Understanding the Gradio Interface
gr.Interface Class is Gradio’s high-level application programming interface (API) that removes complexity. This requires three essential components:
- Celebration (
fn): your Python function that processes the input - Input: input type specification
- Output: Specification of output type
, Exploring input and output components
While you can use simple strings like "text", "image"Or "audio" For specifying components, Gradio provides more control through explicit component classes.
import gradio as gr

demo = gr.Interface(
    fn=lambda x: x,
    inputs=gr.Textbox(lines=2, placeholder="Enter text here..."),
    outputs=gr.Textbox(label="Output")
)
Common components include:
gr.Textbox(): multi-line text inputgr.Image(): Image Upload/Previewgr.Audio():audio file managementgr.Checkbox():boolean inputgr.Slider(): numeric range inputgr.Radio(): multiple choice selectiongr.Dropdown():Select from options
, Handling Multiple Inputs and Outputs
Real-world applications often require multiple inputs or produce multiple outputs. Gradio handles this beautifully with lists.
import gradio as gr

def process_form(name, is_morning, temperature):
    greeting = "Good morning" if is_morning else "Hello"
    message = f"{greeting}, {name}! Temperature: {temperature}°C"
    return message, temperature * 1.8 + 32  # Convert to Fahrenheit

demo = gr.Interface(
    fn=process_form,
    inputs=(
        gr.Textbox(label="Name"),
        gr.Checkbox(label="Is it morning?"),
        gr.Slider(0, 100, label="Temperature (°C)")
    ),
    outputs=(
        gr.Textbox(label="Greeting"),
        gr.Number(label="Temperature (°F)")
    )
)

demo.launch()
Output:
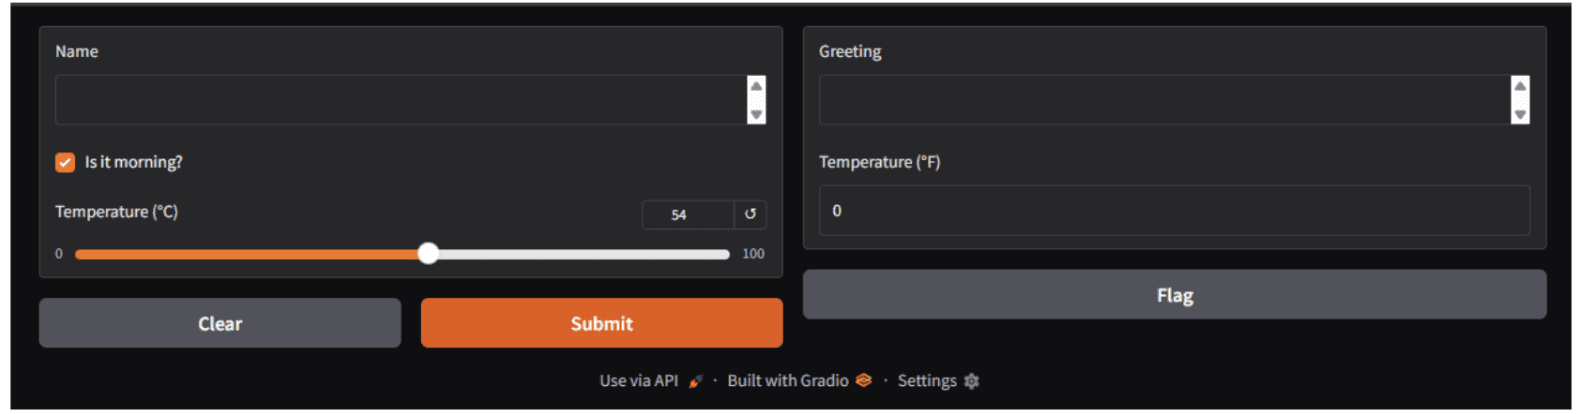
Image by author
When using multiple inputs, your function must accept the same number of parameters. Similarly, multiple outputs require your function to return multiple values.
, processing images
Gradio makes it incredibly easy to demo image processing models:
import gradio as gr
import numpy as np

def apply_sepia(image):
    # Image comes as numpy array with shape (height, width, channels)
    sepia_filter = np.array(((0.393, 0.769, 0.189),
                             (0.349, 0.686, 0.168),
                             (0.272, 0.534, 0.131)))
    sepia_image = image.dot(sepia_filter.T)
    sepia_image = np.clip(sepia_image, 0, 255).astype(np.uint8)
    return sepia_image

demo = gr.Interface(
    fn=apply_sepia,
    inputs=gr.Image(label="Input Image"),
    outputs=gr.Image(label="Sepia Filtered"),
    title="Sepia Filter App"
)

demo.launch()
Output:

Image by author
gr.Image The component automatically manages file uploads, previews and converting images numpy Arrays for processing.
, handling audio processing
Audio applications are fairly straightforward:
import gradio as gr

def transcribe_audio(audio):
    return "Transcribed text would appear here"

demo = gr.Interface(
    fn=transcribe_audio,
    inputs=gr.Audio(label="Upload Audio", type="filepath"),
    outputs=gr.Textbox(label="Transcription"),
    title="Speech-to-Text Demo"
)
demo.launch()
In a real application, you would call a speech recognition model inside this transcribe_audio(audio) Celebration. For demonstration, we will return a placeholder.
Output:

Image by author
, Creating Advanced Layouts with Gradio Blocks
Whereas gr.Interface Perfectly suited for simple applications, gr.Blocks Provides full control over layout and data flow. Think of blocks as a low-level API that lets you build complex, multi-step applications.
, Applying Basic Block Example
import gradio as gr

def greet(name):
    return f"Hello {name}!"

with gr.Blocks() as demo:
    name_input = gr.Textbox(label="Your Name")
    greet_button = gr.Button("Greet")
    output = gr.Textbox(label="Greeting")

    greet_button.click(
        fn=greet,
        inputs=name_input,
        outputs=output
    )

demo.launch()
Output:

Image by author
, Creating Complex Layouts with Rows and Columns
Here is a more sophisticated example of integration transformermake sure that transformer The package is installed on your computer.
pip install transformers

import gradio as gr
from transformers import pipeline

# Load a translation model
translator = pipeline("translation_en_to_de", model="t5-small")

def translate_text(text):
    result = translator(text, max_length=40)(0)
    return result('translation_text')

with gr.Blocks(title="English to German Translator") as demo:
    gr.Markdown("# 🌍 English to German Translator")

    with gr.Row():
        with gr.Column():
            english_input = gr.Textbox(
                label="English Text",
                placeholder="Enter text to translate...",
                lines=4
            )
            translate_btn = gr.Button("Translate", variant="primary")

        with gr.Column():
            german_output = gr.Textbox(
                label="German Translation",
                lines=4
            )

    # Add example prompts
    gr.Examples(
        examples=(
            ("Hello, how are you?"),
            ("The weather is beautiful today"),
            ("Machine learning is fascinating")
        ),
        inputs=english_input
    )

    translate_btn.click(
        fn=translate_text,
        inputs=english_input,
        outputs=german_output
    )

demo.launch()
Output:

Image by author
, State management in Gradio applications
State management is important for interactive applications. Gradio provides two views: global state and session state.
, Managing session state (user-specific)
For user-specific state, use Gradio’s built-in state management. The following example demonstrates a simple chatbot logic using state to maintain conversation history.
import gradio as gr

with gr.Blocks() as demo:
    chatbot = gr.Chatbot(label="Conversation")
    msg = gr.Textbox(label="Your Message")
    clear = gr.Button("Clear")

    state = gr.State(())

    def user_message(message, history):
        # Update history with user message and placeholder for bot
        return "", history + ((message, None))

    def bot_response(history):
        # Simple echo bot logic
        response = f"I received: {history(-1)(0)}"
        history(-1)(1) = response
        return history

    msg.submit(
        user_message,
        (msg, state),
        (msg, state)
    ).then(
        bot_response,
        state,
        chatbot
    )

    clear.click(lambda: (None, ()), None, (chatbot, state))

demo.launch()
, Deploying and sharing your apps
For quick sharing, Gradio can create a public URL:
This generates a temporary, publicly accessible link that is suitable for demos and quick sharing with colleagues. It is generally valid for 72 hours.
For free, permanent hosting:
- create a hugging face Account
- Create a new space with Gradio as a software development kit (SDK)
- Upload your application files:
app.py(your main application file) andrequirements.txt(Python dependencies). An example of what should be inrequirements.txtfile:
git add .
git commit -m "Initial commit"
git push
Your application will be available here https://huggingface.co/spaces/your-username/your-space-name,
Gradio applications can be deployed on any platform that supports Python web applications:
- Use
demo.launch(server_name="0.0.0.0", server_port=7860) - Package your application with all dependencies inside a Docker container
- Deploy to AWS, Google Cloud, Azure, and other platforms
, Building an Image Classification Dashboard
Putting together everything we’ve learned, let’s create a project. This project is a simple image classification dashboard built with pytorch And Gradio. It enables users to upload an image via a web interface and get the top five predicted classes generated by a pre-trained deep learning model.
we will experiment Resnet-50A famous convolutional neural network trained on the ImageNet dataset. Because the model is pre-trained, the project does not require any custom training or labeled data. It is intended for demonstration, experimentation and educational purposes rather than production use.
We will use Gradio to provide a lightweight user interface so that users can interact with the model directly from the browser.
import gradio as gr
import torch
from torchvision import models, transforms
from PIL import Image

# Load pre-trained model
model = models.resnet50(pretrained=True)
model.eval()

# Preprocessing
preprocess = transforms.Compose((
    transforms.Resize(256),
    transforms.CenterCrop(224),
    transforms.ToTensor(),
    transforms.Normalize(
        mean=(0.485, 0.456, 0.406),
        std=(0.229, 0.224, 0.225)
    )
))

def classify_image(image):
    image = Image.fromarray(image)
    input_tensor = preprocess(image)
    input_batch = input_tensor.unsqueeze(0)

    with torch.no_grad():
        output = model(input_batch)

    # Get top 5 predictions
    probabilities = torch.nn.functional.softmax(output(0), dim=0)
    top5_prob, top5_catid = torch.topk(probabilities, 5)

    results = ()
    for i in range(top5_prob.size(0)):
        results.append(f"Category {top5_catid(i).item()}: {top5_prob(i).item()*100:.2f}%")

    return "n".join(results)

demo = gr.Interface(
    fn=classify_image,
    inputs=gr.Image(label="Upload Image"),
    outputs=gr.Textbox(label="Top 5 Predictions"),
    title="Image Classifier"
)

demo.launch()
, wrapping up
Gradio simplifies machine learning deployment by removing traditional barriers between model development and user interaction. With this crash course, you’ve learned the basics of building Gradio interfaces, component-based design for diverse input/output types, advanced layouts using Gradio blocks, state management for interactive applications, and deployment strategies for sharing your work.
The real power of Gradio lies in its simplicity and flexibility. It doesn’t matter whether you’re creating a quick prototype for internal testing or a sophisticated application for public use; Gradio provides the tools you need to bring your machine learning models to life.
Shittu Olumide He is a software engineer and technical writer who is passionate about leveraging cutting-edge technologies to craft compelling narratives, with a keen eye for detail and the ability to simplify complex concepts. You can also find Shittu Twitter,