Introduction
BitNet b1.58, developed by Microsoft researchers, is a native low-bit language model. It is trained from scratch using ternary weights that take only the values -1, 0, and +1. Rather than compressing a large pre-trained model after the fact, BitNet is designed from the outset to run efficiently at very low precision, which reduces memory and computation while maintaining solid performance.
One detail matters: loading BitNet through the standard Transformers library does not automatically deliver its speed and efficiency benefits. To take full advantage of the design, a dedicated C++ implementation called bitnet.cpp is required, since it is specifically optimized for these models. This guide covers running BitNet locally — installing the necessary Linux packages, building bitnet.cpp from source, downloading the 2-billion-parameter model, running it as an interactive chat, starting an inference server, and connecting to it with the OpenAI Python SDK. Readers exploring this area may also find this overview of running and building with local models useful.
Step 1: Install the necessary tools on Linux
Before building BitNet from source, the basic development tools for compiling C++ projects are needed: Clang as the compiler, CMake as the build system, and Git to clone the repository. First, install LLVM, which includes Clang:
bash -c "$(wget -O - https://apt.llvm.org/llvm.sh)"Then update the package list and install the required tools:
sudo apt update
sudo apt install clang cmake git
After this step, the system is ready to build bitnet.cpp from source.
Step 2: Clone and build BitNet
With the tools installed, the next step clones the BitNet repository and builds it locally. First, clone the official repository and move into the project folder:
git clone — recursive https://github.com/microsoft/BitNet.git
cd BitNet
Next, create a Python virtual environment, which keeps the project’s dependencies separate from the system Python:
python -m venv venv
source venv/bin/activate
Install the required Python dependencies:
pip install -r requirements.txtThen compile the project and set up the 2B model. The following command builds the C++ backend with CMake and configures the BitNet-b1.58-2B-4T model:
python setup_env.py -md models/BitNet-b1.58-2B-4T -q i2_sIf necessary, a minor source adjustment replaces a pointer type with a const pointer so the build completes cleanly:
sed -i 's/^(((:space:))*)int8_t * y_col/1const int8_t * y_col/' src/ggml-bitnet-mad.cppStep 3: Download a lightweight BitNet model
The next step downloads the 2B model in GGUF format, which is optimized for local inference with bitnet.cpp. The repository provides a supported-model shortcut through the Hugging Face CLI:
hf download microsoft/BitNet-b1.58-2B-4T-gguf — local-dir models/BitNet-b1.58-2B-4TThis downloads the model files to the models/bitnet-b1.58-2b-4t directory. During the download, output similar to the following appears:
data_summary_card.md: 3.86kB (00:00, 8.06MB/s)
Download complete. Moving file to models/BitNet-b1.58-2B-4T/data_summary_card.md
ggml-model-i2_s.gguf: 100%|████████████████████████████████████████████████| 1.19G/1.19G (00:11<00:00, 106MB/s)
Download complete. Moving file to models/BitNet-b1.58-2B-4T/ggml-model-i2_s.gguf
Fetching 4 files: 100%|████████████████████████████████████████████████| 4/4 (00:11<00:00, 2.89s/it)Once complete, the models directory should look like this:
BitNet/models/BitNet-b1.58-2B-4TStep 4: Run BitNet in interactive chat mode on the CPU
BitNet can now be run directly on the CPU in interactive chat mode:
python run_inference.py
 -m "models/BitNet-b1.58-2B-4T/ggml-model-i2_s.gguf"
 -p "You are a helpful assistant."
 -cnv
The key flags load the GGUF model file, set the system prompt, and enable conversation mode. Performance can be tuned with optional flags such as the number of CPU threads and the maximum number of new tokens generated:
python run_inference.py
 -m "models/BitNet-b1.58-2B-4T/ggml-model-i2_s.gguf"
 -p "You are a helpful assistant."
 -cnv -t 8 -n 128
Once running, a simple command-line chat interface appears, and a typed question is answered directly in the terminal.
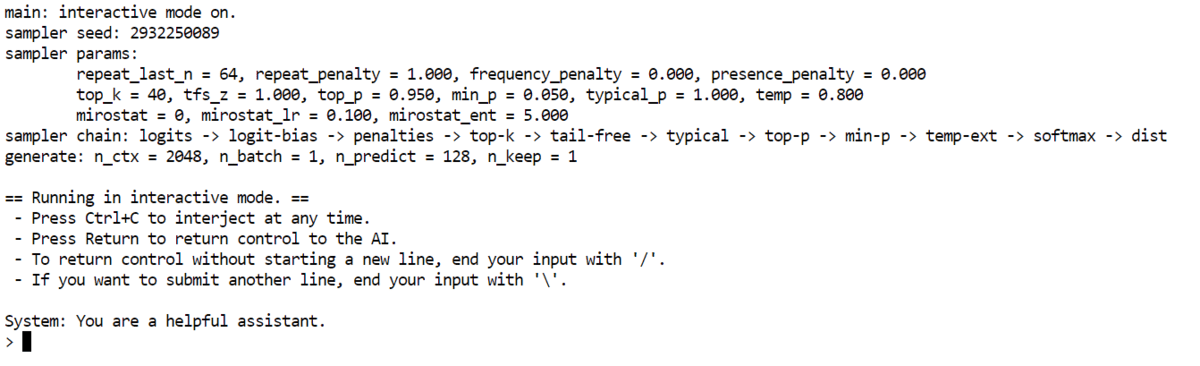
In one test the model was asked who the richest person in the world is and produced a clear, readable answer based on its training data. Even as a small 2B model running on a CPU, the output is consistent and usable.

Step 5: Start a local inference server
BitNet can also run as a local inference server, which makes the model accessible through a browser or to other applications:
python run_inference_server.py
  -m models/BitNet-b1.58-2B-4T/ggml-model-i2_s.gguf
 — host 0.0.0.0
 — port 8080
 -t 8
 -c 2048
 — temperature 0.7
The flags load the model, bind the host so the server is locally accessible, set the port to 8080, choose the number of CPU threads, set the context length, and set the temperature that controls response creativity. Once started, the server is available on port 8080.


Step 6: Connect using the OpenAI Python SDK
With the server running, it can be reached through the OpenAI Python SDK, which means a local model can be used much like a cloud API. After installing the OpenAI package, a short Python script connects to it:
from openai import OpenAI

client = OpenAI(
   base_url="http://127.0.0.1:8080/v1",
   api_key="not-needed"  # many local servers ignore this
)

resp = client.chat.completions.create(
   model="bitnet1b",
   messages=(
       {"role": "system", "content": "You are a helpful assistant."},
       {"role": "user", "content": "Explain Neural Networks in simple terms."}
   ),
   temperature=0.7,
   max_tokens=200,
)

print(resp.choices(0).message.content)
Here the base URL points to the local BitNet server; the API key is required by the SDK but generally ignored by a local server; the model name must match the one the server exposes; and the messages define the system and user prompts. The script returns a completion just as a hosted API would.
Limitations and what to watch
BitNet’s efficiency comes with real constraints. At 2 billion parameters it is small, so its reasoning and factual accuracy will not match large hosted models, and its knowledge is fixed at training time — answers about current events or recent facts can be wrong or outdated. Running through bitnet.cpp requires building from source, which can surface platform-specific compiler issues, and CPU inference speed depends heavily on the hardware. A local server exposed beyond localhost should be secured appropriately, and as with any model, outputs should be reviewed rather than trusted blindly. Within those limits, BitNet is a compelling demonstration of a model designed for efficiency from the ground up rather than quantized after training.
Concluding remarks
BitNet’s appeal lies in its underlying philosophy: it is not simply another quantized model but one built to be efficient from the start, which shows in how lightweight and responsive it remains on modest hardware. The walkthrough moved from a clean Linux setup through building bitnet.cpp, downloading a 2B GGUF model, running interactive chat on the CPU, launching a local inference server, and connecting to it with the OpenAI SDK — a complete path to running a capable model entirely on local hardware.
