
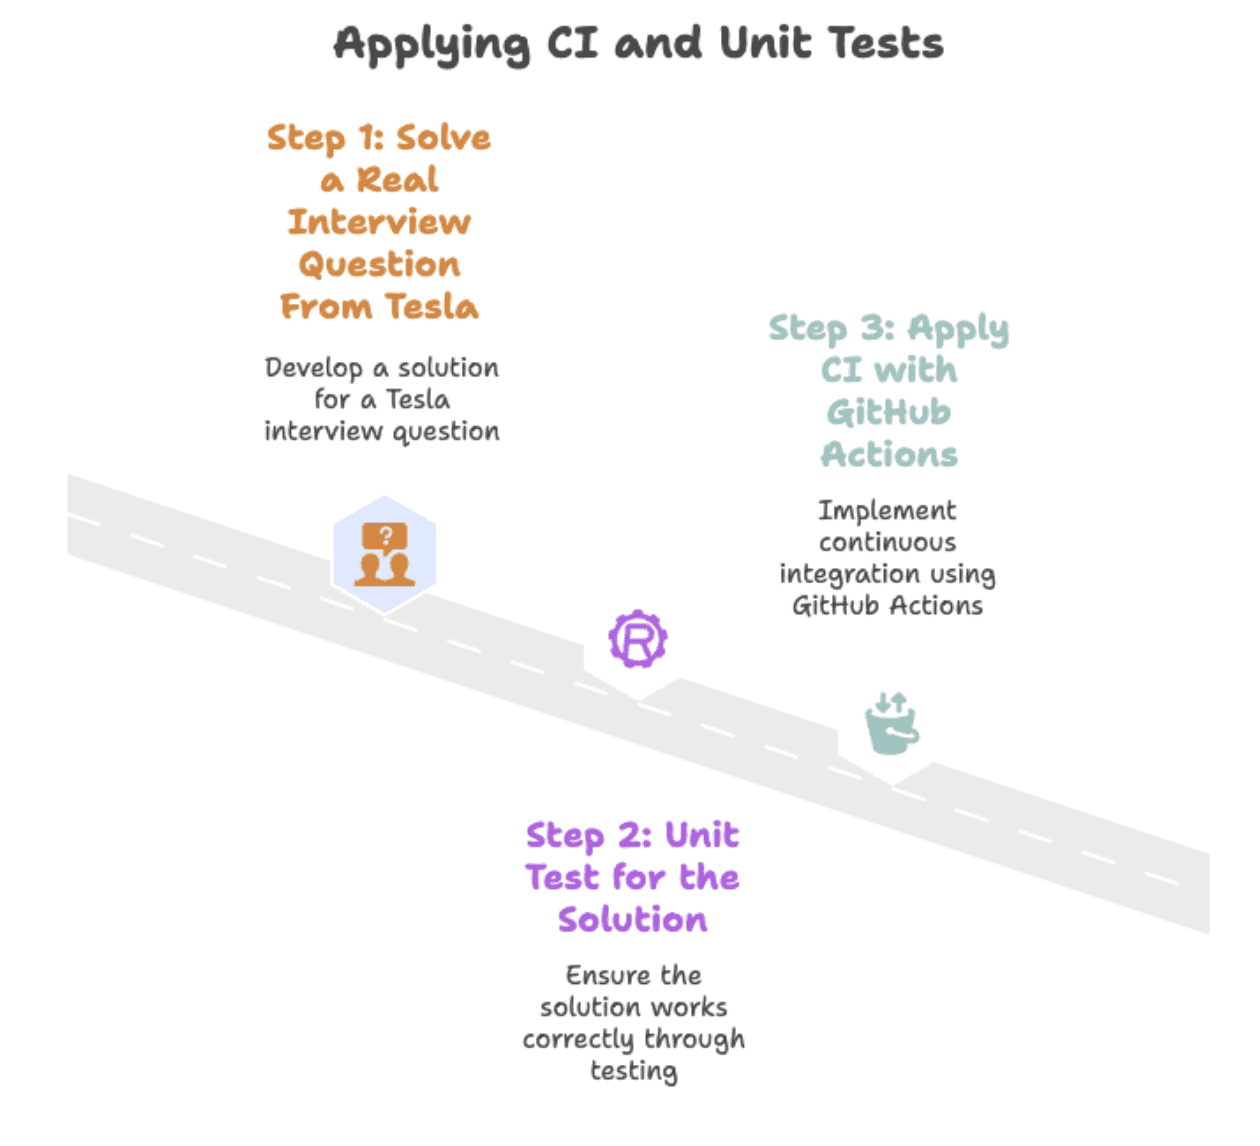
Solving a data problem is the easy half of the job; keeping the solution working is the half that gets skipped. A perfectly working script can break with a single new row of data or a small change in logic — and without tests, nobody notices until the numbers are wrong. This tutorial, adapted from a walkthrough originally published on KDnuggets, takes a real interview-style question and turns the answer into a production-ready solution in three steps: solve the problem in Python, add unit tests so it stays correct, and use GitHub Actions to run those tests automatically on every change.
Step 1: Solving a Real Interview Question
The exercise uses an interview question attributed to Tesla: given a dataset of product launches, return each company’s net change in the number of products launched between 2019 and 2020.
Understanding the Dataset
The first step is always to look at the data. Here are the column names:
| column name | data type |
|---|---|
| Year | int64 |
| Company Name | object |
| Product Name | object |
And a preview of the rows:
| Year | Company Name | Product Name |
|---|---|---|
| 2019 | toyota | avalon |
| 2019 | toyota | camry |
| 2020 | toyota | Corolla |
| 2019 | Honda | Accord |
| 2019 | Honda | Passport |
The dataset has three columns — year, company_name, and product_name — where each row represents a car model released by a company in a given year.
Writing the Python Solution
Basic pandas operations are enough to group, compare, and calculate net product changes per company. The function splits the data into subsets for 2019 and 2020, merges them by company name, and counts the number of unique products launched in each year.
import pandas as pd
import numpy as np
from datetime import datetime

df_2020 = car_launches(car_launches('year').astype(str) == '2020')
df_2019 = car_launches(car_launches('year').astype(str) == '2019')
df = pd.merge(df_2020, df_2019, how='outer', on=(
    'company_name'), suffixes=('_2020', '_2019')).fillna(0)
The final output subtracts the 2019 counts from the 2020 counts to get the net difference. Here is the complete code:
import pandas as pd
import numpy as np
from datetime import datetime

df_2020 = car_launches(car_launches('year').astype(str) == '2020')
df_2019 = car_launches(car_launches('year').astype(str) == '2019')
df = pd.merge(df_2020, df_2019, how='outer', on=(
    'company_name'), suffixes=('_2020', '_2019')).fillna(0)
df = df(df('product_name_2020') != df('product_name_2019'))
df = df.groupby(('company_name')).agg(
    {'product_name_2020': 'nunique', 'product_name_2019': 'nunique'}).reset_index()
df('net_new_products') = df('product_name_2020') - df('product_name_2019')
result = df(('company_name', 'net_new_products'))
Expected Output
| Company Name | Net_new_products |
|---|---|
| chevrolet | 2 |
| ford | -1 |
| Honda | -3 |
| Jeep | 1 |
| toyota | -1 |
Step 2: Making the Solution Reliable with Unit Tests
Fixing a data problem once does not mean it stays fixed. A renamed column or a changed argument can silently break a script. Imagine a column rename causes this line:
df('net_new_products') = df('product_name_2020') - df('product_name_2019')to become:
df('new_products') = df('product_name_2020') - df('product_name_2019')The code still runs, but the output no longer matches what downstream users expect. Unit tests catch exactly this class of failure: they check that the same input produces the same, correct output every time.

Converting the Script to a Reusable Function
Before writing tests, the solution needs to be testable. Wrapping the logic in a function makes it possible to run it against different datasets and verify the output automatically, without rewriting code each time. The original script becomes a function that accepts DataFrame and returns a result:
def calculate_net_new_products(car_launches):
    df_2020 = car_launches(car_launches('year').astype(str) == '2020')
    df_2019 = car_launches(car_launches('year').astype(str) == '2019')

    df = pd.merge(df_2020, df_2019, how='outer', on=(
        'company_name'), suffixes=('_2020', '_2019')).fillna(0)

    df = df(df('product_name_2020') != df('product_name_2019'))

    df = df.groupby(('company_name')).agg({
        'product_name_2020': 'nunique',
        'product_name_2019': 'nunique'
    }).reset_index()

    df('net_new_products') = df('product_name_2020') - df('product_name_2019')
    return df(('company_name', 'net_new_products'))
Defining Test Data and Expected Output
A test needs a definition of “right.” Creating a small test input with a clearly defined correct output gives the function a benchmark to be compared against:
import pandas as pd

# Sample test data
test_data = pd.DataFrame({
    'year': (2019, 2019, 2020, 2020),
    'company_name': ('Toyota', 'Toyota', 'Toyota', 'Toyota'),
    'product_name': ('Camry', 'Avalon', 'Corolla', 'Yaris')
})

# Expected output
expected_output = pd.DataFrame({
    'company_name': ('Toyota'),
    'net_new_products': (0)  # 2 in 2020 - 2 in 2019
})
Writing and Running Unit Tests
The test below checks whether the function returns exactly the expected result.  If it does not, the test fails and reports why, down to the specific row or column.
  It uses the function from the previous step (
calculate_net_new_products()) together with the expected output defined above:
import unittest

class TestProductDifference(unittest.TestCase):
    def test_net_new_products(self):
        result = calculate_net_new_products(test_data)
        result = result.sort_values('company_name').reset_index(drop=True)
        expected = expected_output.sort_values('company_name').reset_index(drop=True)

        pd.testing.assert_frame_equal(result, expected)

if __name__ == '__main__':
    unittest.main()
Step 3: Automating Tests with GitHub Actions
Tests only protect a project if they actually run. Running them manually after each change does not scale, is easy to forget, and behaves differently across machines. Continuous integration (CI) solves this by running the test suite automatically whenever code is pushed to the repository. GitHub Actions provides this as a free service for public repositories: every push triggers the tests, keeping the solution reliable even as code, data, or logic changes.
Organizing the Project Files
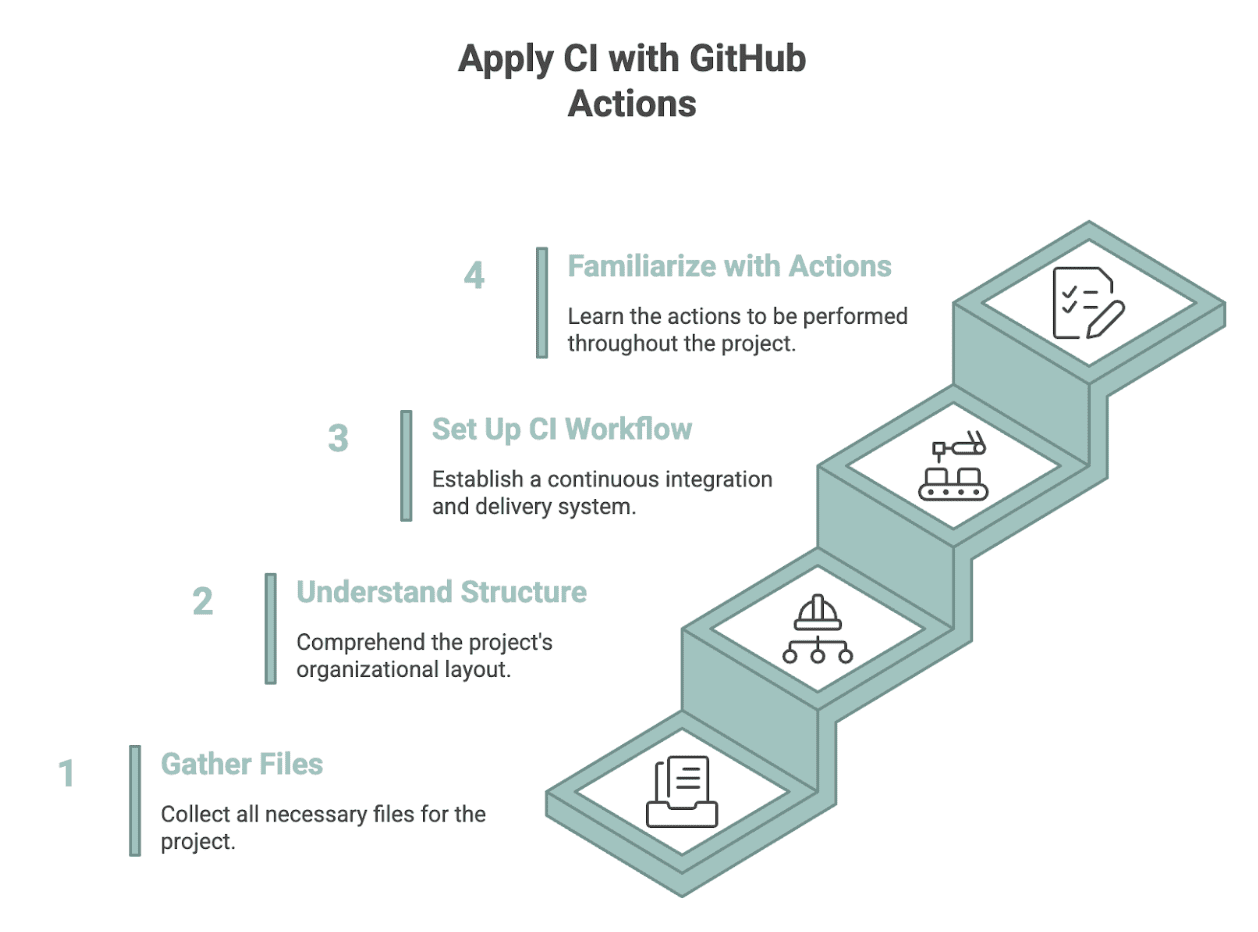
To apply CI, the solution first needs to live in a GitHub repository, organized into the following files:
solution.py— the solution from Step 1expected_output.py— the test inputs and expected outputs from Step 2test_solution.py— the unit testsunittestfrom Step 2requirements.txt— the dependencies (for example, pandas).github/workflows/test.yml— the GitHub Actions workflow filedata/car_launches.csv
Kept in this structure, the project stays easy to navigate for anyone who works on it later.
my-query-solution/
├── data/
│   └── car_launches.csv
├── solution.py
├── expected_output.py
├── test_solution.py
├── requirements.txt
└── .github/
    └── workflows/
        └── test.yml
Creating the GitHub Actions Workflow
The last required file is test.yml — the file that tells GitHub Actions how and when to run the tests. First, the workflow gets a name and a trigger:
name: Run Unit Tests

on:
  push:
    branches: ( main )
  pull_request:
    branches: ( main )
With this configuration, tests run every time someone pushes code or opens a pull request on the main branch. Next comes the job definition:
jobs:
  test:
    runs-on: ubuntu-latest
The job runs in GitHub’s Ubuntu environment, providing a clean setup on every run. The first step checks out the repository so the workflow can access the code:
    - name: Checkout repository
      uses: actions/checkout@v4
The next step installs Python at the chosen version:
    - name: Set up Python
      uses: actions/setup-python@v5
      with:
        python-version: "3.10"
Then the dependencies listed in requirements.txt are installed:
    - name: Install dependencies
      run: |
        python -m pip install --upgrade pip
        pip install -r requirements.txt
And finally, the workflow runs all unit tests in the project:
    - name: Run unit tests
      run: python -m unittest discover
This last step executes the tests automatically and surfaces errors if anything breaks. The full file, for reference:
name: Run Unit Tests

on:
  push:
    branches: ( main )
  pull_request:
    branches: ( main )

jobs:
  test:
    runs-on: ubuntu-latest

    steps:
    - name: Checkout repository
      uses: actions/checkout@v4

    - name: Set up Python
      uses: actions/setup-python@v5
      with:
        python-version: "3.10"

    - name: Install dependencies
      run: |
        python -m pip install --upgrade pip
        pip install -r requirements.txt

    - name: Run unit tests
      run: python -m unittest discover
Reviewing Test Results in GitHub Actions
Once the files are pushed to the repository, results appear under the Actions tab:

A green checkmark means every step ran successfully:

Clicking into the run shows the complete log, from installing Python to executing the tests. A checkmark on each step confirms the code behaved as intended against every test defined:

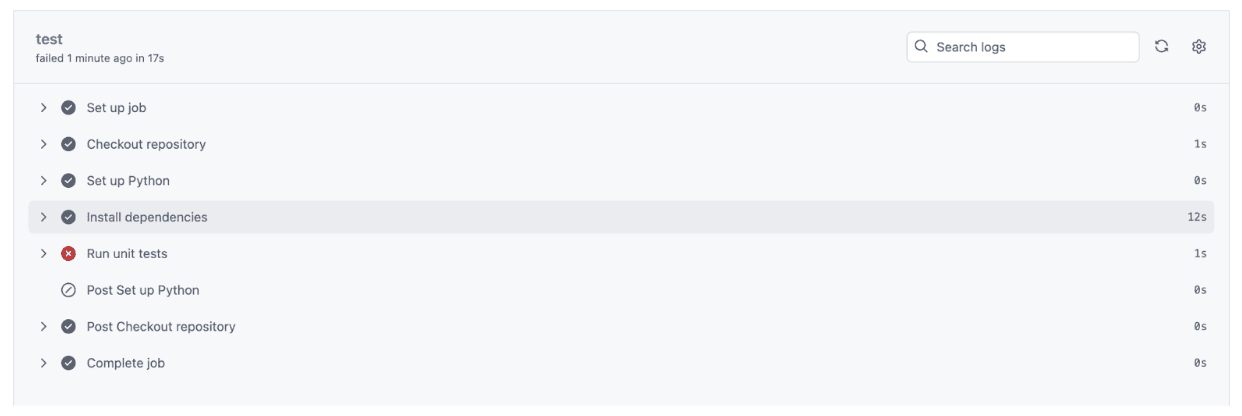
In this example the unit test completed in about a second, and the entire CI process finished in seventeen seconds — verifying everything from setup to test execution.
When a Small Change Breaks the Test
Not every change passes. Suppose a column solution.py is accidentally renamed and the change is pushed to GitHub:
# Original (works fine)
df('net_new_products') = df('product_name_2020') - df('product_name_2019')

# Accidental change
df('new_products') = df('product_name_2020') - df('product_name_2019')
The Actions tab now reports a failure:

Clicking the failed run shows the details:

And opening the failed step reveals the full error message:
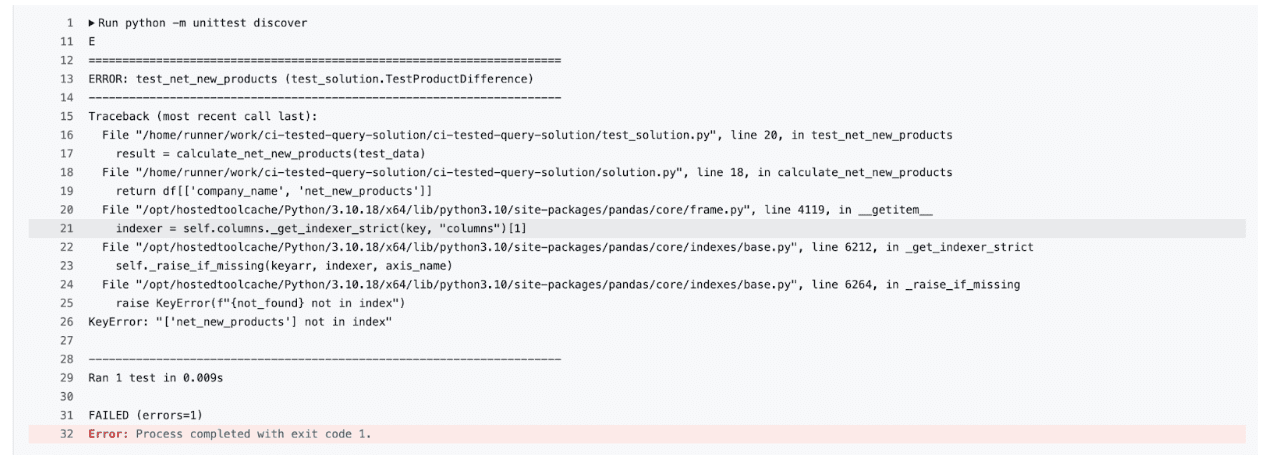
The tests caught the problem KeyError: 'net_new_products' because the column names in the function no longer match what the test expects. This is the safety net in action: the code stays under constant check, protecting the project from anyone’s honest mistakes — including the original author’s.
Using Version Control to Track and Test Changes
Version control ties the workflow together by tracking every change to logic, tests, and data. To try a new way of grouping the data, the safer path is a new branch rather than editing the main script directly:
git checkout -b refactor-groupingFrom there: make the changes, commit them, and let the tests run. If all tests pass, merge the branch; if not, discard it without ever touching the main code. Every change becomes tracked, testable, and reversible.
Limitations and What to Watch
A few caveats keep this pattern in perspective. Unit tests are only as good as their expected outputs — a wrong benchmark bakes the error in, so test data deserves the same review as production code. Small hand-built test datasets also cannot catch every real-world edge case; realistic synthetic data helps, an approach covered in this related guide to building a production-grade mock data pipeline with Polyfactory. GitHub Actions is free for public repositories but metered for private ones, and CI that runs on push does not remove the need for code review. None of this diminishes the core lesson: a solution that passes tests automatically on every change is worth far more — in interviews and in production — than one that merely worked once.
