
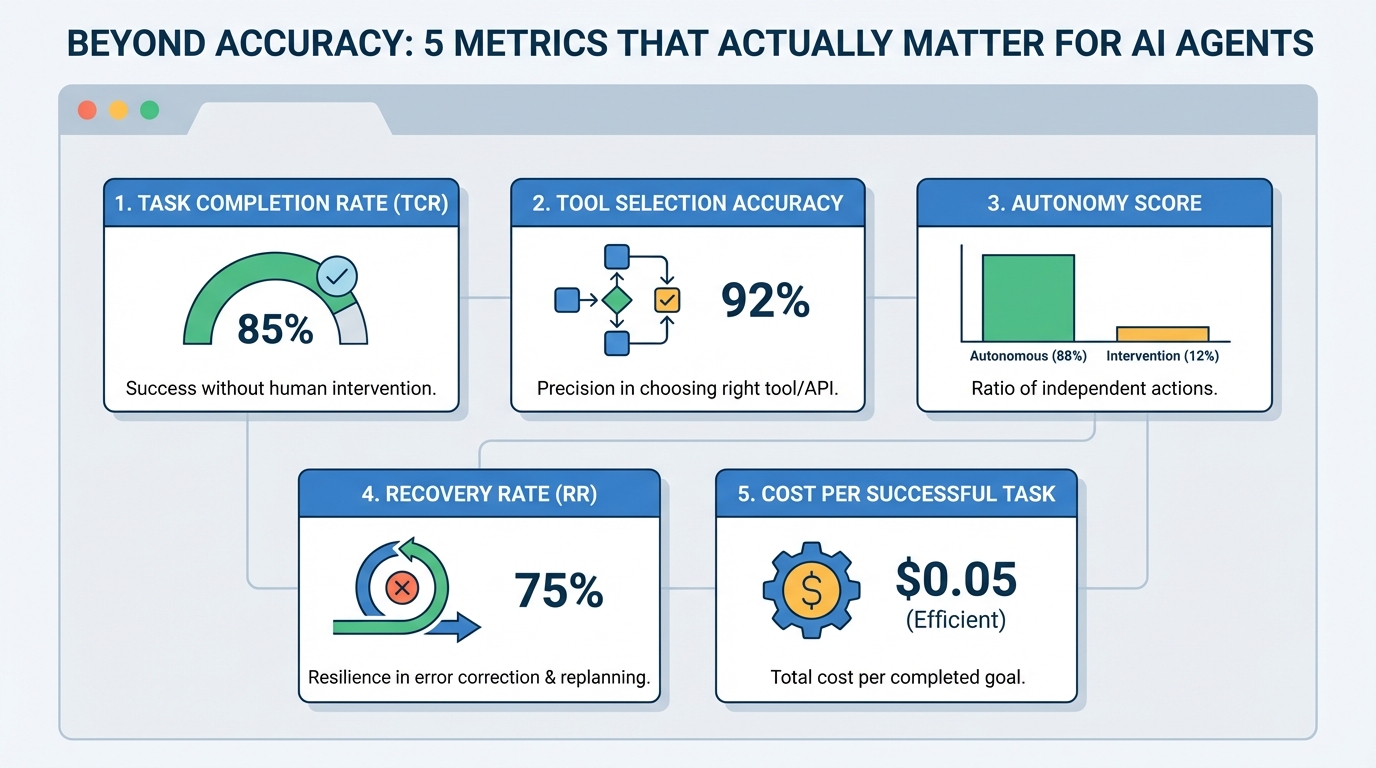
Autonomous systems powered by agentic AI have reshaped how AI is built and deployed, and as these systems take on more multi-step work, evaluating them well has become harder. Accuracy, the workhorse metric for static large language models, captures whether a single answer is right, but it says little about whether an agent chose the right actions, used its tools well, recovered from mistakes, or finished the job efficiently. Judging agents therefore calls for additional measures focused on action quality, tool use, and the efficiency of the path an agent takes to a goal. The five metrics below go beyond accuracy, each with a note on how to interpret it.
1. Task Completion Rate (TCR)
Also called the success rate, Task Completion Rate measures the percentage of assigned tasks an agent completes successfully without human supervision or intervention. It is the most intuitive headline metric, a direct measure of whether the agent actually does the job. Its main limitation is that it is binary and outcome-only: it records that a task succeeded or failed, not why, so it is best paired with the more diagnostic metrics that follow.
2. Tool selection accuracy
Modern agents act by calling tools, such as search, code execution, or external APIs, so a central question is whether the agent picks the right tool for each step. Tool selection accuracy measures how often it does. Evaluating it usually requires a “ground truth” or gold-standard path to compare against, which can be difficult to define when several reasonable approaches exist. Despite that challenge, it is one of the most revealing diagnostics, because poor tool choices are a common hidden cause of failures that a pure success-rate number would mask. A broader overview of tool selection covers the nuances.
3. Autonomy Score
Also known as the human-intervention rate, the Autonomy Score is the ratio of actions an agent takes on its own to those requiring human input, such as clarification, correction, or approval. It connects directly to the return on investment of deploying agents, since every human touch adds cost. It must be read in context, however. In high-stakes domains such as healthcare or finance, lower autonomy is often appropriate, and an unusually high autonomy score can be a warning sign that safety guardrails are missing rather than a mark of quality. Research on measuring agent autonomy explores this trade-off in depth.
4. Recovery Rate (RR)
Recovery Rate captures how often an agent detects that something has gone wrong and successfully replans to correct it. It is a measure of resilience, which matters most for agents that interact with devices and external systems outside their direct control, where unexpected outcomes are routine. As with autonomy, interpretation matters: a very high recovery rate can indicate underlying instability if the agent is constantly correcting itself, so the metric is most useful alongside a count of how often errors occur in the first place. The idea is examined further in this research paper.
5. Cost per successful task
Sometimes described as token efficiency or cost-per-goal, this metric measures the total computational or economic cost required to complete a task successfully. It becomes essential when planning to scale an agent system to higher volumes, where small per-task inefficiencies multiply into significant bills. Tracking cost per successful task, rather than cost per attempt, also keeps the focus on value: an agent that is cheap per call but frequently fails can be more expensive per result than a pricier one that succeeds reliably.
Where to start
For teams beginning to evaluate an agent, a practical sequence is to instrument Task Completion Rate first, because it is the easiest to define and the most visible to stakeholders, then add cost per successful task to keep scaling decisions grounded. Tool selection accuracy and recovery rate take more effort to set up, since both depend on defining what “correct” looks like, but they pay off by explaining the failures that the headline numbers only hint at. Autonomy score is worth tracking from the outset in regulated settings, where the right level of human oversight is part of the requirements rather than an afterthought.
Using the metrics together
No single number captures agent quality. Task Completion Rate says whether the work gets done; tool selection accuracy and recovery rate explain how, and how robustly; the autonomy score frames how much human effort is still required; and cost per successful task ties the whole picture back to economics. Read in isolation, each can mislead, a high success rate built on heavy human intervention, or a high recovery rate masking constant errors, so the most useful evaluations track several together and interpret them in the context of the specific application. This kind of measurement discipline is also part of what separates agent projects that reach production from the many that stall before delivering value, and it matters more still in multi-agent systems, where small inefficiencies compound across components.
